Diary Entry:
This project was a lot of fun. I enjoyed taking pictures of a subject in motion, rather than a stationary pose. I had a little trouble printing the photograph of the dancer with the lower shutter speed (the second one on here). Even after I am finished I am not very happy with it. The other photograph, with the higher shutter speed was much easier: I had a low exposure time of 12 seconds and no filter was needed.
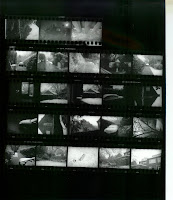
Contact Sheet:

Composition:
This test strip was taken at aperature 5.6 with 10 - 40 seconds of exposure time.

This is the final print, at aperature 5.6 and 12 seconds of exposure. I'm pretty happy about the way this photo turned out.
 Tribal Dance (Africa): This a cultural dance of this particular tribe in Africa. The costumes look like traditional tribal red clothes and beads. This picture was taken of a man in midair during the dance, with other tribe members watching right behind him. The lighting was natural by the sun high in the sky, judging by the shadows on the ground. The angle of the photograph is almost straight on, but slightly to the right side.
 Tango: This is a traditional Latin American dance. It is meant to be very sensual and romantic. The costumes are usually black pants for the males and a flowy top, and bright or black dresses and high heels for the women. This photograph has a very interesting composition. It shows only the dancers' feet and legs, and cuts off at the hips. The woman's legs are wrapped around the male's in an action shot. The lighting looks very natural, and gives perfect contrast to the image. This one is my favorite photograph in the image bank.
 Russian Ballet: The Russian Ballet is a very famous classic ballet group. The costumes are traditional, skin tight leotards, tights, ballet shoes, and tutus for the women. This looks like a studio image, the dancers posing in an impressive stance. The background is softly lit, darker on the left side, with a soft pink glow. The lighting seems to come from the top left, to create shadows on the ground and a brighter central point in the background.
 Line Dancing: This is a form of dance used in Canada and the U.S. to compliment country music. The costumes are usually denim jeans or skirts, big Western belts, and cowboy boots and hats. This image looks like it was taken by a spectator using a bright flash in a dimly lit location, judging by the darker background and washed out legs in the front. It was taken at a caddy-corner angle, giving depht to the photograph, and allowing the viewer to see the second and third rows.
 Hip Hop: This is a very modern form of street dance used all around the world. Dancers usually wear baggy clothes and street clothes. This picture was taken in the middle of an "up in the air" move, and makes for a very interesting image. There is also another guy on the dance floor who looks as if he is complimenting the main dancer. Spectators in the background are watching. The lighting is soft, and looks like it comes from the front side and from the top, judging by the shadows on the wood floor. The angle is straight on the dance floor, but behind the dancers, in order to capture the spectators.


This is an A4 print, with aperature 5.6 and 60 seconds exposure time. I put a low filter in and increased the aperature to try and get some better contrast.
This is a test strip at aperature 8, filter 1.5, and 150, 160, 170, and 180 seconds of exposure. This is the final print, with aperature 8, filter 1.5, 150 seconds. I'm still not completely happy with it, and I would have liked to have more time to work with this print.
Theory Notes:
In black and white photography, three common filters are used. They are magenta, yellow, and cyan. Filters are used to create more contrast in a photograph by darkening complimentary tones of the filter, and lightening similar tones. In this way, a magenta filter darkens green and yellow hues while lightening red, blue, and obviously magenta hues. A yellow filter darkens blue hues while lightening yellow, red, and green hues. A cyan filter darkens red hues while lightening blue, yellow, and green hues. The filters may also be put together in different combinations to create a variety of intensitites for darkening and lightening the different hues. When you use a filter, you have to increase the exposure time because some of the light is lost on the paper. Also, be careful when using a filter because sometimes the image may turn out grainy.

This is a test strip at aperature 8, filter 1.5, and 150, 160, 170, and 180 seconds of exposure.
This is the final print, with aperature 8, filter 1.5, 150 seconds. I'm still not completely happy with it, and I would have liked to have more time to work with this print.
Theory Notes:
In black and white photography, three common filters are used. They are magenta, yellow, and cyan. Filters are used to create more contrast in a photograph by darkening complimentary tones of the filter, and lightening similar tones. In this way, a magenta filter darkens green and yellow hues while lightening red, blue, and obviously magenta hues. A yellow filter darkens blue hues while lightening yellow, red, and green hues. A cyan filter darkens red hues while lightening blue, yellow, and green hues. The filters may also be put together in different combinations to create a variety of intensitites for darkening and lightening the different hues. When you use a filter, you have to increase the exposure time because some of the light is lost on the paper. Also, be careful when using a filter because sometimes the image may turn out grainy.
Image Bank:
 Tribal Dance (Africa): This a cultural dance of this particular tribe in Africa. The costumes look like traditional tribal red clothes and beads. This picture was taken of a man in midair during the dance, with other tribe members watching right behind him. The lighting was natural by the sun high in the sky, judging by the shadows on the ground. The angle of the photograph is almost straight on, but slightly to the right side.
 Tango: This is a traditional Latin American dance. It is meant to be very sensual and romantic. The costumes are usually black pants for the males and a flowy top, and bright or black dresses and high heels for the women. This photograph has a very interesting composition. It shows only the dancers' feet and legs, and cuts off at the hips. The woman's legs are wrapped around the male's in an action shot. The lighting looks very natural, and gives perfect contrast to the image. This one is my favorite photograph in the image bank.
 Russian Ballet: The Russian Ballet is a very famous classic ballet group. The costumes are traditional, skin tight leotards, tights, ballet shoes, and tutus for the women. This looks like a studio image, the dancers posing in an impressive stance. The background is softly lit, darker on the left side, with a soft pink glow. The lighting seems to come from the top left, to create shadows on the ground and a brighter central point in the background.
  Line Dancing: This is a form of dance used in Canada and the U.S. to compliment country music. The costumes are usually denim jeans or skirts, big Western belts, and cowboy boots and hats. This image looks like it was taken by a spectator using a bright flash in a dimly lit location, judging by the darker background and washed out legs in the front. It was taken at a caddy-corner angle, giving depht to the photograph, and allowing the viewer to see the second and third rows.
 Hip Hop: This is a very modern form of street dance used all around the world. Dancers usually wear baggy clothes and street clothes. This picture was taken in the middle of an "up in the air" move, and makes for a very interesting image. There is also another guy on the dance floor who looks as if he is complimenting the main dancer. Spectators in the background are watching. The lighting is soft, and looks like it comes from the front side and from the top, judging by the shadows on the wood floor. The angle is straight on the dance floor, but behind the dancers, in order to capture the spectators.
Belly-dancing: This is a form of cutltural dancing in India. As depicted in the image, dancers usually brightly colored, flowy costumes, bangles, and bare feet. Like the name implies, the dancers midriff is unclothed. The dark background in the image creates a nice contrast to the bright pink costume. The lighting here is soft, creating a subtle shadow on the dark floor. The photograph is taken at an unusual angle, from the side and back, which makes the image more interesting.


 Flash Guide Numbers: The numbers indicate how much light will be emitted in relation to a specific filmspeed. The higher the number, the more powerful the light is. You can also use the numbers to determine the proper aperature by dividing the guide number by the distance from you to the subject. This is an image of a flash with digital guide numbers, but on some flashes instead of the digital screen, there might be a chart to read the numbers instead.
 Diary Entry

 Final Print: I used exactly the same settings as the last print, and it came out very well: